INSTALLATION OF KALI LINUX
WELCOME TO TAMILCODE
HERE IS TRICKS AND TECHNOLOGY
So in this website, we going to see the installation of Kali Linux, and we going to install Kali Linux in VirtualBox
So download the Kali Linux ISO file from the official website link is below.
After downloading the ISO file.
Download VirtualBox using the below button.
So first click the new button and enter the os name which in Kali Linux
So next check the type and version (shown in the above picture)
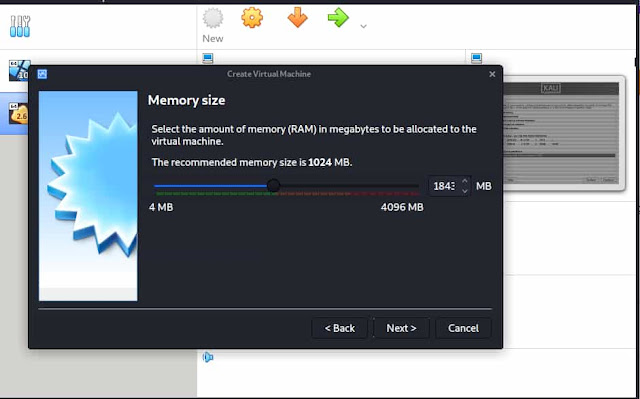
And click the next button. now it asks to set memory size which is called RAM so set RAM is shown in the below picture.
Next, it will ask the hard disk to check the image
So next it will ask the hard disk file ( shown below image)
So next set the disk size so enter the size 30 GB (shown below image)
So click the create button so now your hardware has been set next we going to iso file.
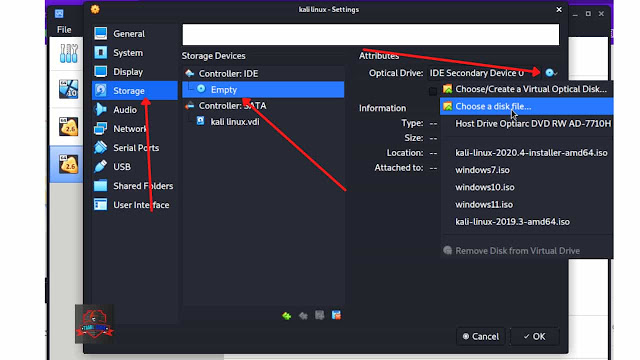
Now we going to set the iso file. so click the storage and select the empty disk and set the iso file.
you can able to see the Kali Linux BIOS mode which is shown below.
And click the graphical installer. now it will ask you to select the language to choose your language.
Next, it will ask the country. so choose your country.
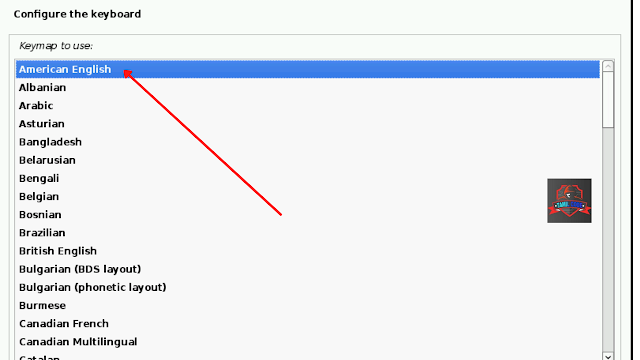
Next, it will ask the keyboard to configure so choose the 1 option American keyboard.
Next, it will ask to set hostname so enter your hostname I'm going to enter the default name kali.
Next, it will ask for the domain name. it only optional so do not enter anything in the domain name.
Next, it will ask to set the username so enter the username.
And it will ask to set the password so enter your password.
After further installation, you're in partition now format your disk so click the first option which is guided - use the entire disk.
Next, click the continue button.
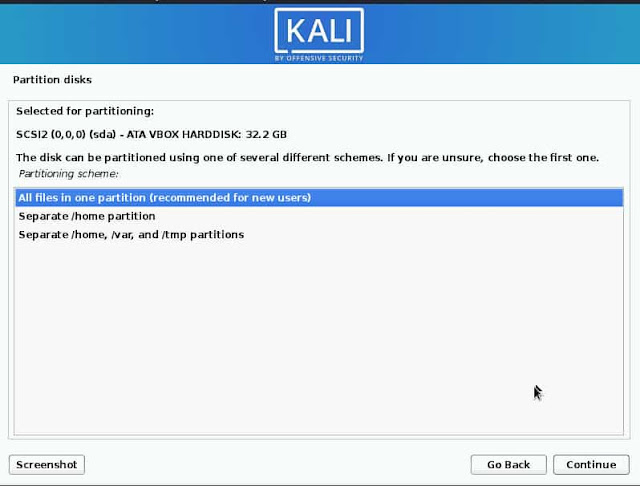
So now you're in disk partition so click the first option which is all one partition.
Next will show the finished partition so click the finish partition.
Next, it asks the yes or no for formating the disk so click the yes option to format the disk.
So now the base system installation will start so wait for 45 min.
And it asks for anything just click continue and it will ask the proxy to set. if want a proxy set otherwise won't set just click the continue button.
After the long process it will ask the grub boot loader so click the yes option.


Post a Comment